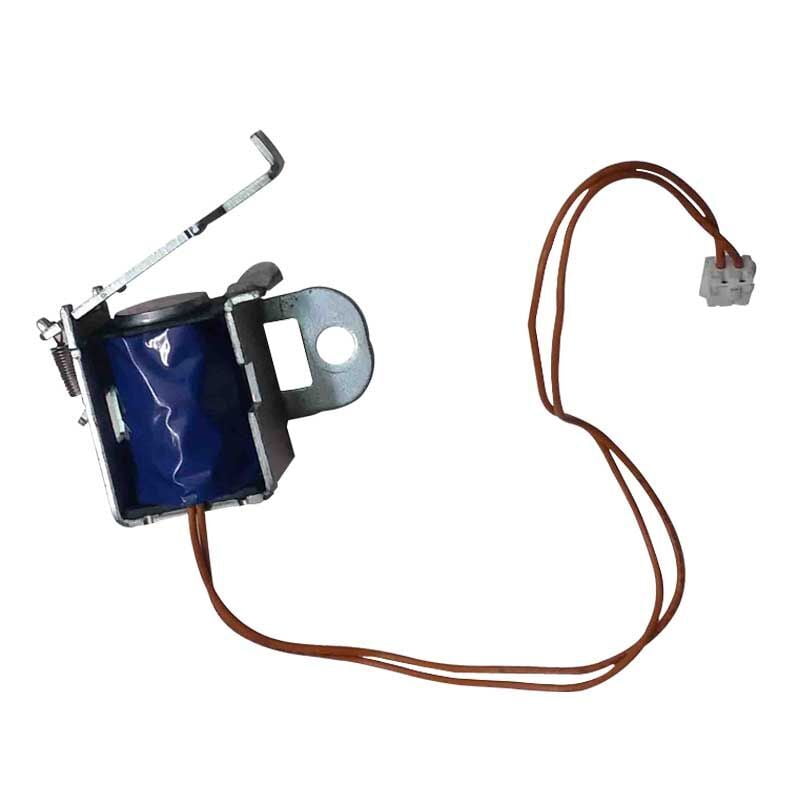
Solenoid (Relay) For HP LaserJet 1020 M1005 Canon LBP 2900 Printer
Compatible with
RK2-0778 RK2-0220 RK2-0420
Use With :
HP LaserJet M1005 Printer
HP LaserJet 1020
Canon 2900B
Steps to Replace Solenoid (Relay) For HP LaserJet 1020 M1005 Canon LBP 2900 Printer :
Power Off the Printer
- Turn off the printer and unplug it from the electrical outlet for safety.
Open the Printer Cover
- Lift the front cover to access the toner cartridge and internal components.
Remove the Toner Cartridge
- Carefully take out the toner cartridge and set it aside on a clean surface.
Access the Printer Internals
- Depending on the model, you may need to remove the back or side panels. Use a screwdriver to remove any screws necessary for access.
Locate the Solenoid
- Identify the solenoid (relay) near the fuser unit or paper feed mechanism.
Disconnect the Wiring
- Carefully unplug any connectors attached to the solenoid. Take note of where each connector goes for reassembly.
Remove the Old Solenoid
- If the solenoid is secured with screws, use a screwdriver to remove them. Carefully pull the solenoid out of its housing.
Install the New Solenoid
- Take the new solenoid and position it in the same location as the old one. Secure it with screws if applicable.
Reconnect the Wiring
- Plug in any connectors that were disconnected earlier, ensuring they are secure and properly aligned.
Reassemble the Printer
- Replace any side or back panels that were removed and secure them with screws.
Reinstall the Toner Cartridge
- Carefully insert the toner cartridge back into the printer.
Close the Printer Cover
- Close the front cover securely.
Power On the Printer
- Plug the printer back into the electrical outlet and turn it on. Allow it to initialize.
Test the Printer
- Print a test page to verify that the printer is functioning properly and that the new solenoid is operating as expected.
We hope this information helps with your product build. For more details, feel free to check out our blogs. You’ll also find troubleshooting steps for PC issues, described in simple and easy-to-follow instructions, allowing anyone to fix the problems themselves. We also release troubleshooting newsletters, which provide additional guidance for resolving issues. We’re glad to be helping people with real solutions to their challenges.
Shop today and use your printer effortlessly.


Reviews
There are no reviews yet.