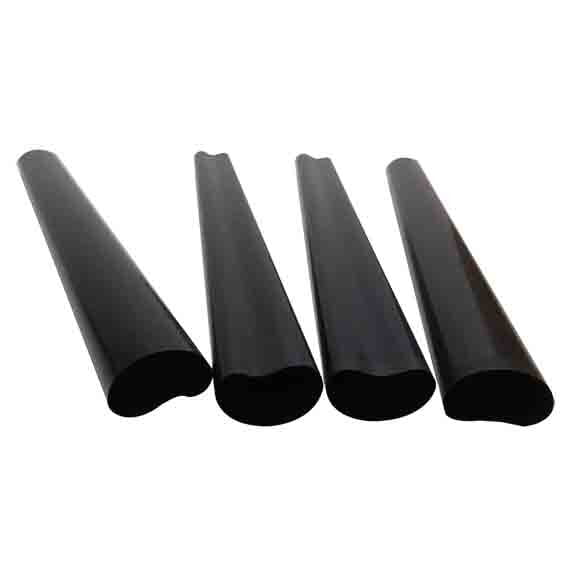
Replacing the Fuser Film Teflon Inside Black Outside Black A-grade is a technical task that involves partially disassembling the printer. The fuser film is a critical part of the fuser assembly, responsible for fixing toner onto the paper by applying heat and pressure. Here’s a step-by-step guide:
Switch off and remove the printer from the power source.
Let the printer to cool down, mainly the fuser unit, as it can get too hot.
Work in a static-free environment to secure electronic parts.
Take off the Toner Cartridge:
Pull out the front cover of the printer.
Undo the toner cartridge and set it aside.
Take out the Rear Cover:
Move the printer around and track down the screws at the back.
Undo the screws using a Philips screwdriver and softly raise off the rear cover. Be careful of any clips that may keep it in place.
Take off the Top Cover:
Once the back cover is removed, find the screws that secure the top cover.
Take out these screws and carefully raise the top cover, taking care not to damage any plastic tabs.
Enter the Fuser Assembly:
With the top cover off, you would see the fuser assembly at the rear of the printer.
Remove any wiring or connectors connected to the fuser unit. These connectors are normally for power and control signals.
Fling off the Fuser Assembly:
Discover and take off the screws holding the fuser assembly in place.
Carefully move the fuser unit out of the printer. Take care of any gears or cables connected to the fuser.
Dismantle the Fuser Film Teflon:
Now that you have the fuser assembly, find the fuser film sleeve. It would be packed around the heat roller.
Carefully take off the fixing screws or clamps that hold the fuser film in place.
Remove the old fuser film sleeve. You might need to use tweezers or a flathead screwdriver to assist guide it off, but be gentle to evade damaging the surrounding components.
Place the Fuser Film Teflon Inside Black Outside Black:
Before putting the new fuser film, clean the heat roller with a soft, lint-free cloth to take off any toner residue or debris.
Use a thin layer of heat-resistant grease (often given with the fuser film) on the heat roller to make sure smooth rotation and evade friction.
Slip the new fuser film over the heat roller, ensuring it sits evenly and is lined up correctly.
Put together the Fuser Film Teflon Inside Black Outside Black :
Place any screws, clamps, or brackets you taken off earlier to fix the new fuser film in place.
Make sure that the pressure roller (the lower roller in the fuser assembly) is also lined up properly.
Place the Fuser Film Teflon Inside Black Outside Black :
Move the fuser assembly back into the printer.
Reconnect any cables or connectors to the fuser unit, making sure all connections are secure.
Reassemble the Printer:
Change the top cover of the printer, fixing it with screws.
Reconnect the rear cover and lock the screws.
Last, replace the toner cartridge.
Check the Printer & Test Fuser Film Teflon Inside Black Outside Black :
Connect the printer back into the power source and switch it on.
Take a test page to make certain that the new fuser film is working properly and there are no paper jams or print quality problems.
We hope this information helps with your product build. For more details, feel free to check out our blogs. You’ll also find troubleshooting steps for PC issues, described in simple and easy-to-follow instructions, allowing anyone to fix the problems themselves. We also release troubleshooting newsletters, which provide additional guidance for resolving issues. We’re glad to be helping people with real solutions to their challenges.
Shop Fuser Film Teflon Inside Black Outside Black A-grade today and use your printer effortlessly.


Reviews
There are no reviews yet.